Plastidip References
- Loki
- Apr 25, 2017
- 4 min read

This is a very basic tutorial copied from the plastidip artist fb group. We will go over this and anything else that comes at the build because this is very basic. I will also post a materials list soon.
General Plastidip (PD) Tips and Tricks
Wear clothes that you don’t mind being damaged and get a plastic table that you don’t care about from wal mart for $20, work on that table with cement flooring underneath you (NO CARPET), contact cement, and PD are syrupy and will get on everything.
I use Contact Cement (DAP Brand personally) as it is better for adhering foam to foam, super 77 (spray adhesive) is likely to erode once PD gets applied, it does not leave a layer thick enough.
When making a shield, get some deli/butcher paper as large as your shield, draw out everything on that. Don’t start cutting foam until you know how it will look on the shield.
If you want to make multiple works, or if you want the pattern for later, make your design out of poster board.
When making a shield, make sure you have an Micro Cell Foam skin as large as the face of the shield, you need to skin your shield before adding designs.
When making a strap shield, glue the MC skin over the front face of the shield ONLY AFTER you have strapped your shield already, also, glue a piece of your deli/butcher paper over where your strap comes onto the face of your shield, this will prevent the strap from being glued to your MC skin and rubbing/pulling your foam off.
BUY THESE
in lieu of MC and for the detail work over the MC skin. (Foamies sheets 36 in. wide and 60 in. tall). They're thin and glue easily, easy to cut and you get great details.
When designing something with a round edge (like a shield). You NEED to incorporate something into your design that breaks up the edge because you can't just do all of the edge in one go.
There are overlap issues and you can't make the foamie roll clean from the face to the back. You have to have cuts and lines around the edge to hide the fact that it is not just one piece
Any seams in your MC or foam design are going to show up; PD does not fill in gaps, at all. If you have a 1/36" gap, it will show, if you are FLUSH it will show. The only way to make it look like one piece is to make it out of one piece. Plan the design with the seams in mind.
PD does not hide mistakes, only foam does, even then only slightly.
Make sure that your glue has cured for at MINIMUM 24 hours before you start to apply PD. If you don't, the PD will eat through the glue and your edges will curl. Hell, even after letting it cure correctly it will occasionally eat your glue. Luckily re-gluing is not hard, just annoying, but it can dirty your edges.
Detail work should be spray PD'd (either a shaker can or a spray brush if you have access).
Durability edges (where you want to make sure the PD holds and adds structure) should be brushed on.
Watch for bristles coming off your brush. Foam brushes tend to gloop onto the brush and not go on smoothly.
EVERYTHING that is getting PD'd should be cloth or microcell. If you PD polyurethane (PE) foam, it won't stick as well or it will leave an odd texture/aesthetic, which may be fine if thats what your going for...but people will be able to tell.
Cloth PDs surprisingly well and can look pretty pimp (see anything Fitz has done).
I use sport solid cloth because there is no way to replace the cloth without ripping all of the PD off, so you want something that will last.
Anything with a plastic surface (tape especially) the PD will eventually rub off. Cloth tape can be PD'd but it will look like PD'd cloth tape.
It adheres to leather. . . mostly, eventually it will rub off, you need it to be microcell foam (foamies are a microcell foam) or natural clothfiber cloth if you don’t want it to rub off.
Don't leave your brush just sitting around between coats. The PD on the brush will dry and turn it into a pretty brush sculpture There is no way to make PD a liquid after it has become a solid save letting it sit in Mineral spirits for a day, even then its iffy.
I keep a glass jar full of mineral spirits next to my PD so I can leave my brush in it.
Invest in a paint can, a small one, they are a dollar at most hardware stores, the can that the PD comes in cannot be resealed well if at all.
If the PD leaks out, that shit is impossible to clean unless you have a flooring with a plastic type surface (linoleum comes to mind). When you are ready to PD take a rubber band and put it around the can top to bottom so that it hangs over the open mouth of the paint can.
When you are taking excess PD off your brush, do it on the rubber band so the PD doesn't get into the lip seam of the paint can, this can prevent a good seal and waste your PD.
If you have something that you don’t want PD’d but that PD needs to be near (leather sword handle, leather shield handle, leather strap, cloth cover for your sword) cover it in painter’s tape before putting your PD on, it will save you time and effort and make your line clean.
For fine details, use a pencil style X-acto knife. For larger cuts that still need to be clean, use a extendable blade Razorknife.
For rivets, take a rotary style leather punch and choose what size of rivet head you want, then stamp them out to your heart’s content.
---------------------------------------------------------------------------
Materials:
Spray PD:
Paint PD:
Foamies:
Cheap brushes of various sized from 3" all the way down to fine detail brushes. Bigger ones for PD smaller for paint.
Exacto knife
Painters tape
Clear Coat:
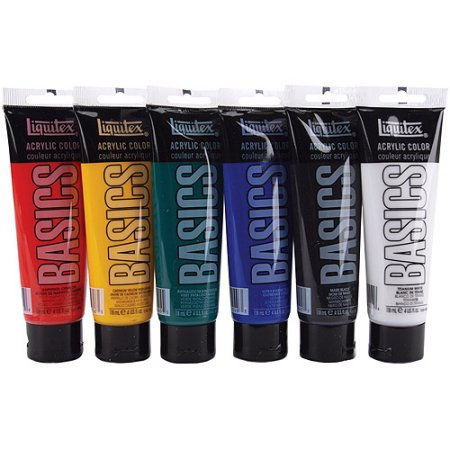
Paints...I usually use these:
Anything else is really just tools of the trade which you will learn. These are the very basic materials needed to make a PD work. Amounts will vary depending on what your trying to make but we can give you recommendations if your unsure,...but extra is always better.
Plastidip Artists FB Page:
https://www.facebook.com/groups/plastidip/
-------------------------------------------------------------------------------------


Comments